Consider the following 5 individual images that are used for an animation:


One approach of animating these images might be to create a sprite, load the 5 images and attach them to the sprite. An example of this can be found by going to the Examples section and selecting Animation sprites - part 1.
While this approach will work well enough it isn't the most optimal method. At least on this scale it's going to work reasonably well, however, imagine this on a much larger scale with many more images and sprites being used. When this happens the likelihood is that loading times will increase and your game may potentially slow down at runtime.
The solution for this problem is to use the Image Joiner tool. This tool will take a collection of images and combine them into one large image. The result of this is that you can reduce loading times and gain a performance advantage at runtime.
When run through the Image Joiner the previous images are combined together to form one new image:

Within your code one sprite can be created (just like before), but this time it is only necessary to load 1 image and apply that to your sprite, thus reducing the amount of code used and minimising load times. An example of this can be found by going to the Examples section and selecting Animation sprites - part 2.
The Image Joiner utility can be found by going to the location where AGK is installed, opening the IDE folder, then the Utilities folder, then the Image Joiner folder and then running the Image Joiner program.
Prior to running the Image Joiner program it is necessary to take any individual images that you want to be combined and place them in a folder. For example, the 5 images for the hot air balloon could be placed in d:/balloon.
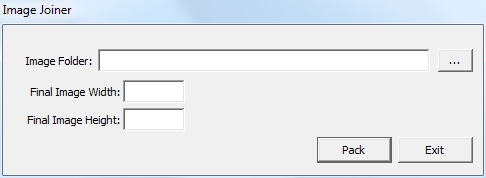
When you run the Image Joiner utility you will be presented with this dialog:

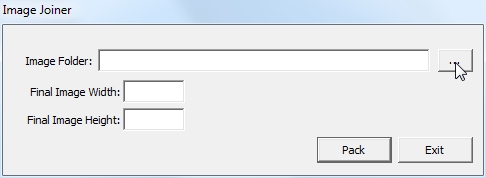
The first step is to select the button for the Image folder edit box:

Once you do this a dialog will pop up prompting you to select a folder where your images are located. Navigate to this folder and press the okay button.

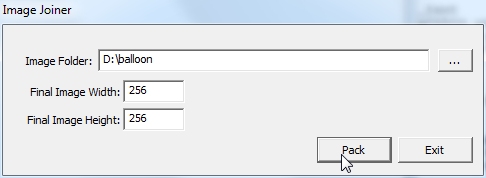
The next step is to enter a width and height for the final combined image. Consider the quantity of images you have and their dimensions and estimate how large an image you need to fit all of these on. In this particular example dimensions of 256 x 256 have been selected:

The final step when using this tool is to select the Pack button. After being told that the operation has completed you can press the Exit button to close the Image Joiner tool.
Now navigate to the location where your images are stored. A folder named result will he been created at this location:

Enter the result folder and you will find a text file and an image:

Copy these files into your applications media folder and then you're all set to use them within your game.
If you need to change the default name then ensure that you edit both files. By default the files are named:
You could rename them like this:
To see an example of this go to the Examples section and select Animation sprites - part 2.